


Be Our Guest

There has been a years-long evolution as to when we opt for a DIY solution in the midst of a big project.
Back in the 1980s, in our first semi-detached early 20th century house, DIY was always Plan A. Decks, plaster, paint, trees and hardwood floors were either planned and fixed by the two of us or they went undone. The budget was small and the results were mixed. Still, in those early days when our TV viewing schedule revolved around The New Yankee Workshop, and Craftsman tools seemed to be the epitome of quality, there was nothing I’d rather do than end the weekend with lungs filled with plaster dust and fumes.
Among the failures there were a few successes, and we never got discouraged. In fact during the last twenty years I doubled down on the idea of building things myself, acquiring skills and tools until I created Combray Furniture Studio and spent most of my days in the shop. The design came fairly easy and the aesthetics of Stickley and Morris and Barnsley influenced any number of pieces that I am quite glad I built. But I had no stomach for the selling side of the business and the solitary nature of the work began to weigh heavily. So in our move to the city many tools were sold (for pennies on the dollar), and calling someone in for a project became easier on the pocketbook and schedule.
Let’s face it, as you get older you also begin to see your own limitations. I may have been proud of the deck I built, but if on-the-fly engineering results in something inspectors inform the next owner of the house “must be removed due to code issues” you’ve not done yourself any favors. And without a design background (and only a loose understanding of the Golden Ratio and Fibonacci), your great designs can, over time, look about as cool as your collegiate perm.
But no matter how hard we tried, we could not find anyone willing to deal with our troublesome guest room.
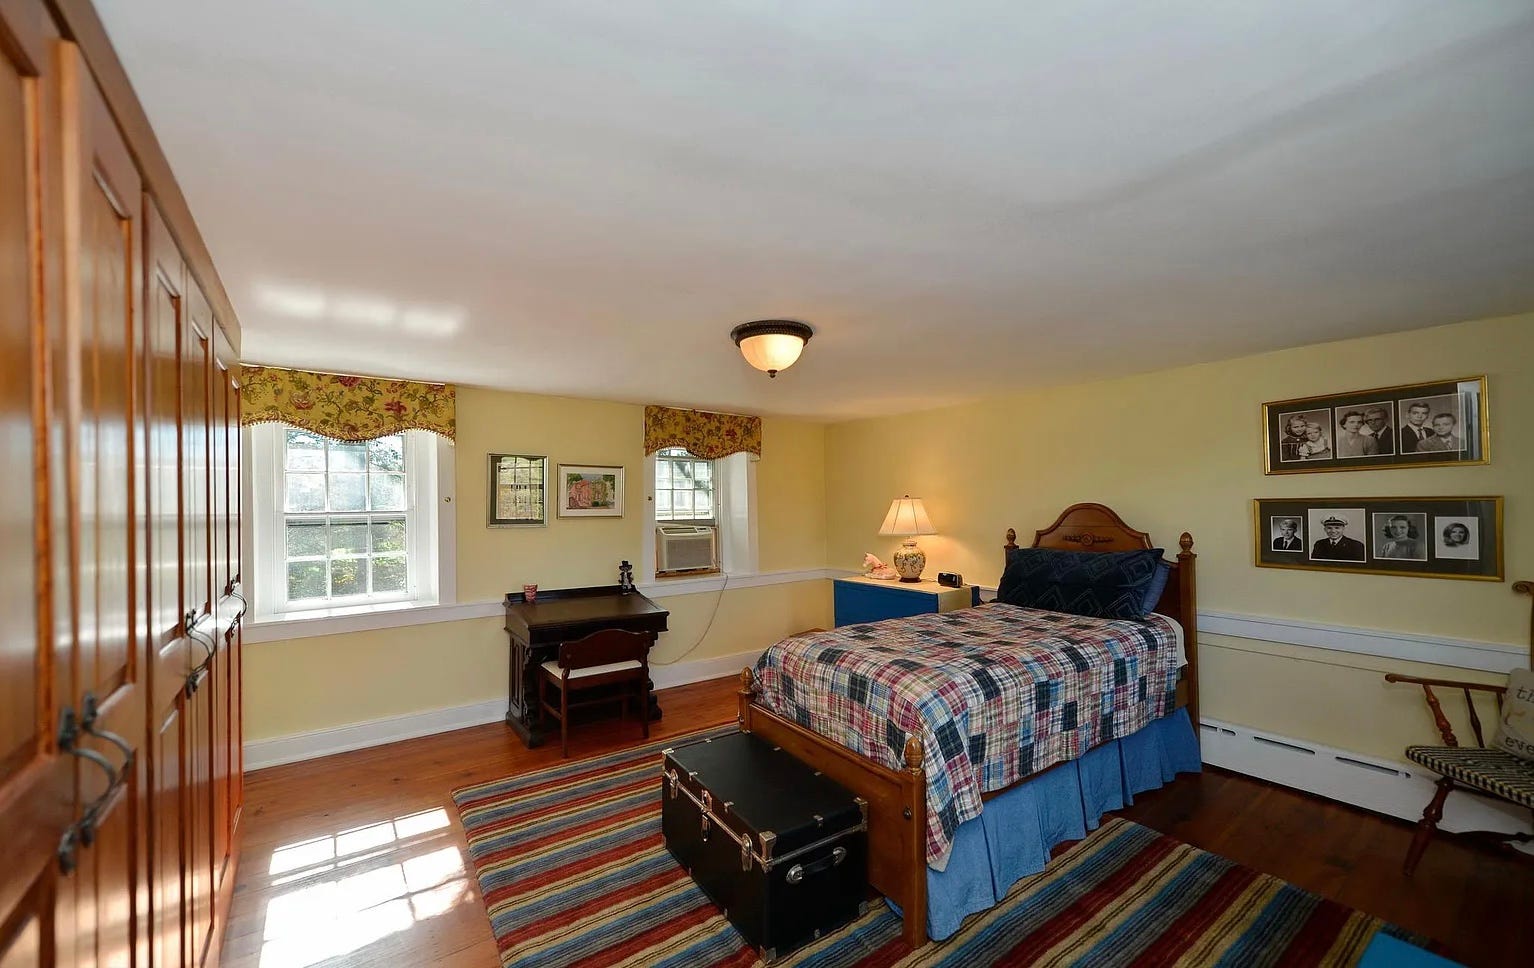
The brief is simple: Take one out-of-square, neglected bedroom with trapezoidal shaped windows, covered in the previous owners’ favorite baby-shit yellow paint, and topped off with a horrid, amber-faded pine floor and make it an attractive space. Not only was it not square on any dimension (the height changes by four inches from one side to the other), but the horsehair and plaster treatment over the stone wavers in and out like an accordion. And before you say it, it does not have any “charm of an old house” vibe. It just looks like a self-build (which it is—circa 1844) gone horribly wrong.
A parade of bewildered contractors passed through, rubbed their collective chins, and never returned our calls. Part of the problem was that there were so many dimensional variables going on, even I had a hard time figuring out what I actually wanted to do. What I needed was a little man named “Bud”, with a stub of a pencil behind his ear and a metal lunchbox, who did calculations on his fingers and came in ahead of schedule and under budget. The “Buds” of the world seemed to be thin on the ground.
So, I decided that whatever skills and experience I had could be (just) enough to allow me to stick the pencil behind my ear and improvise my way through the project.
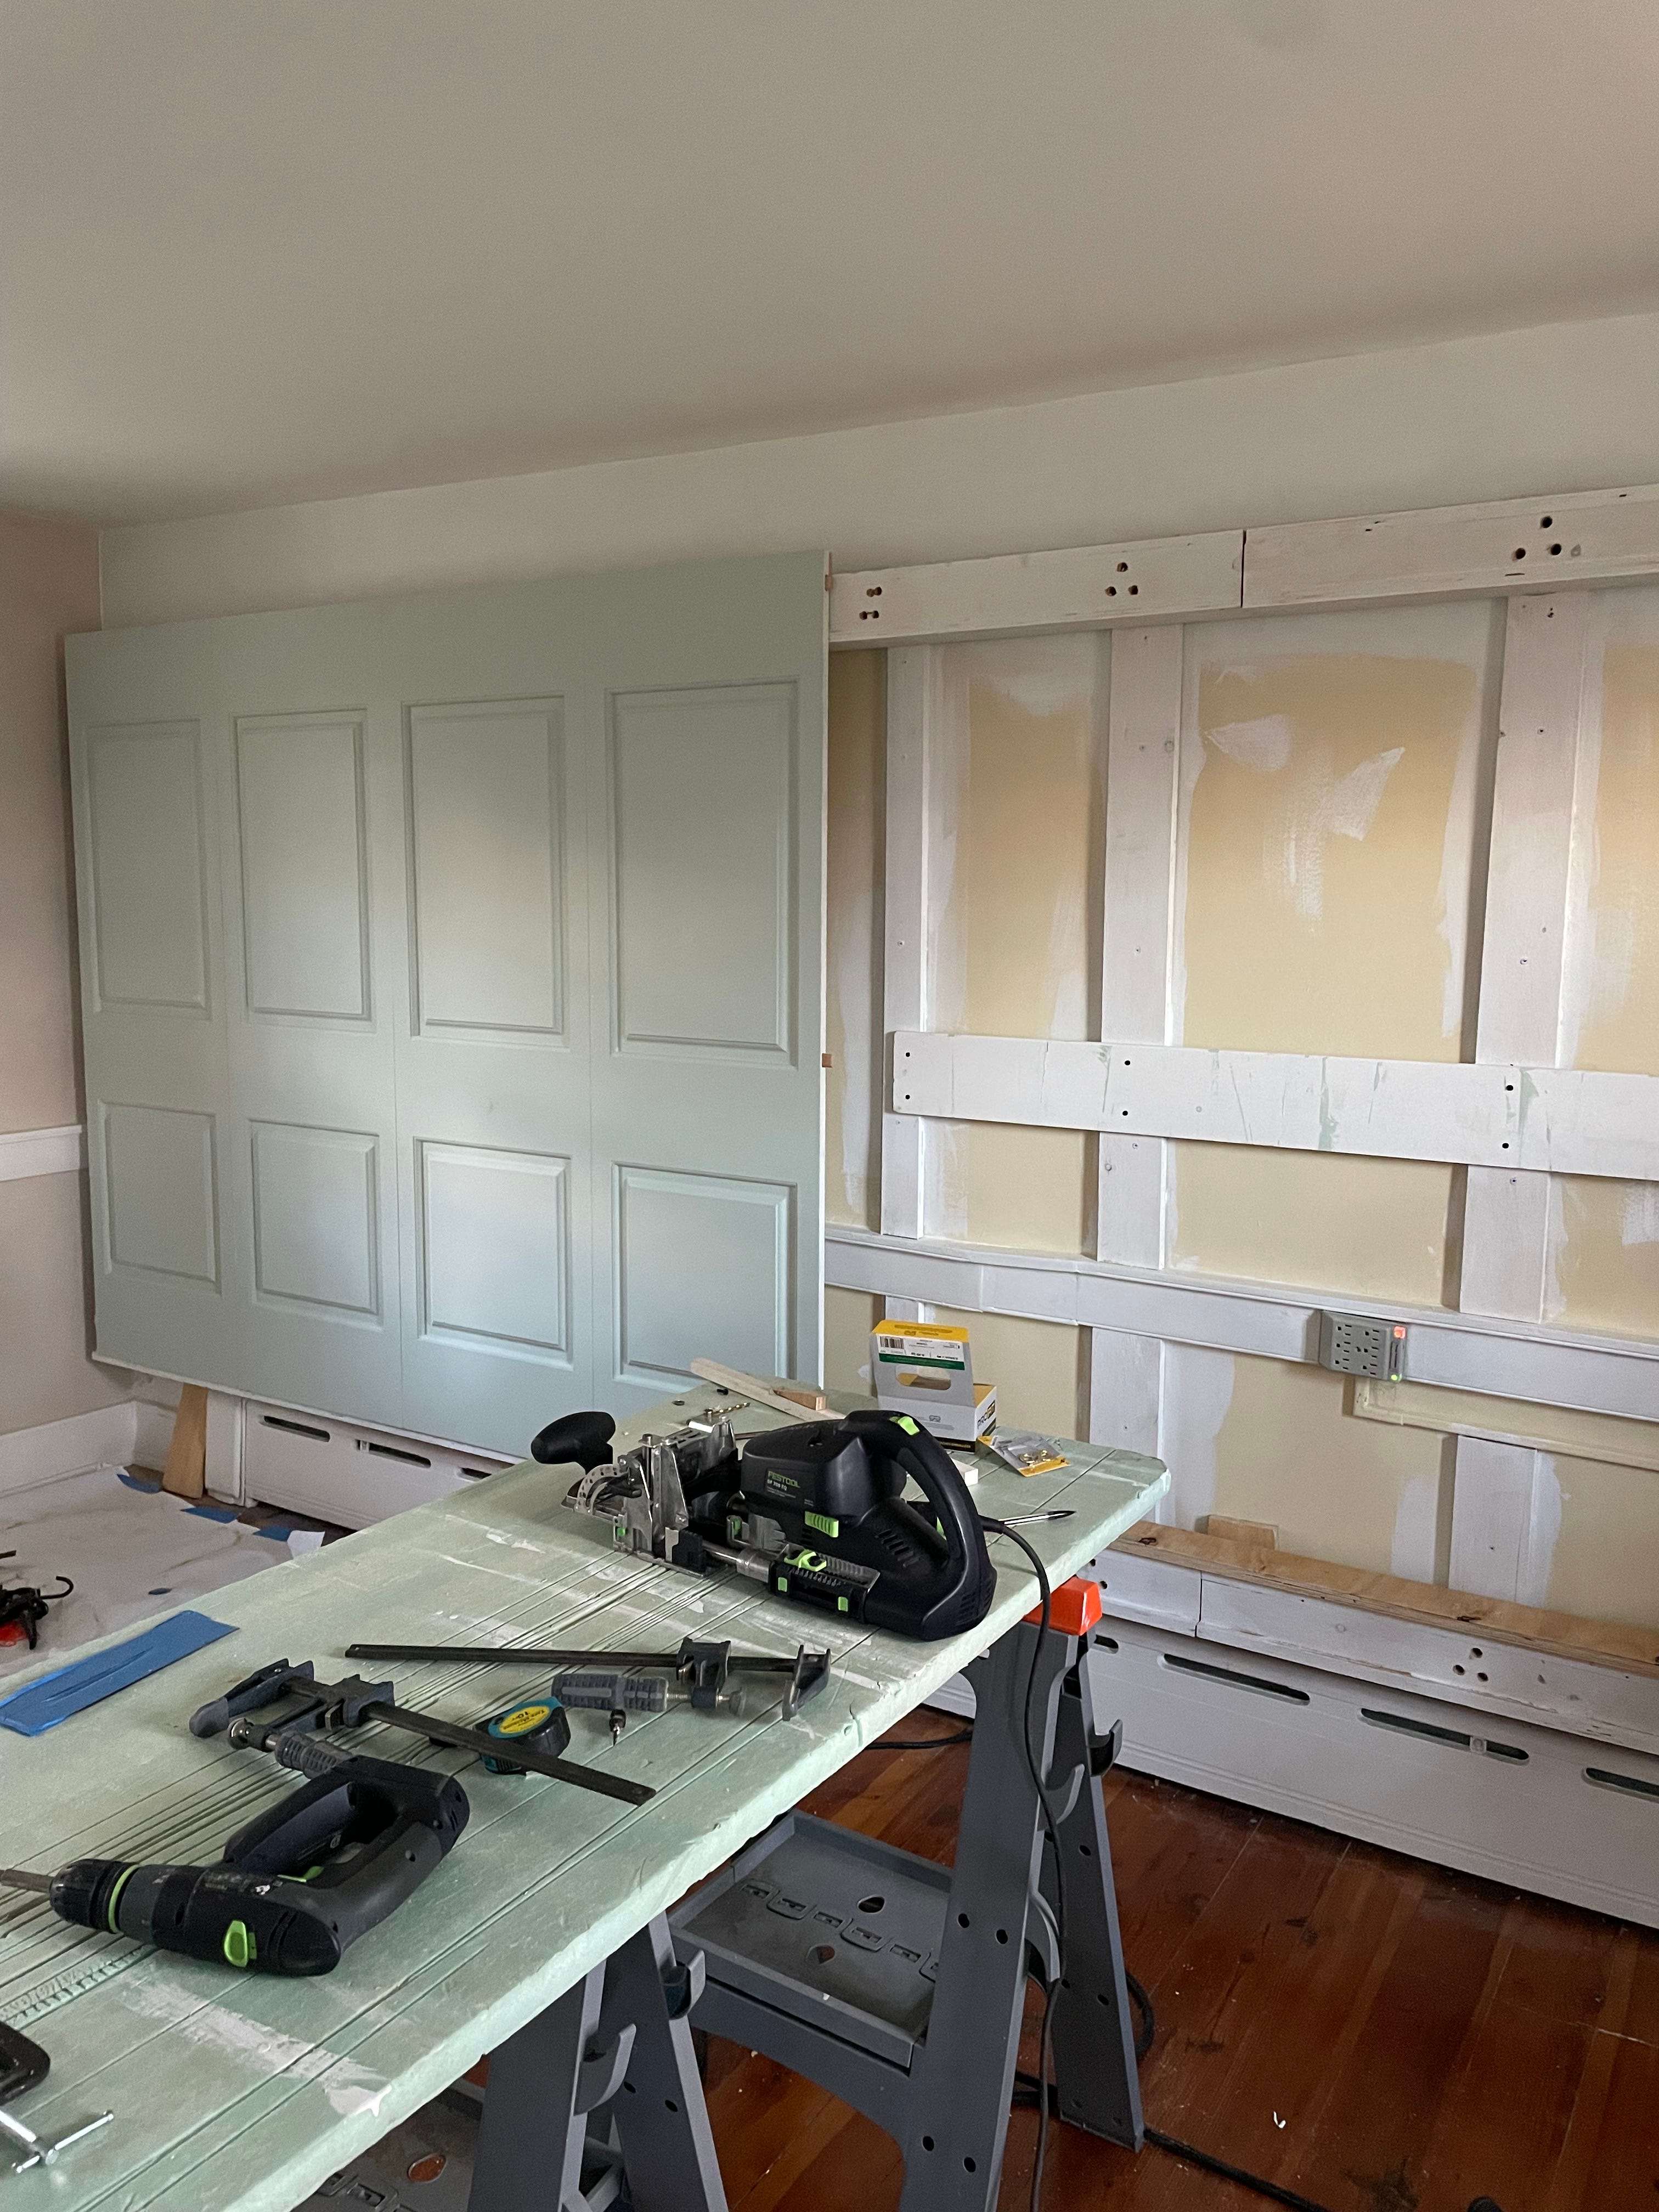
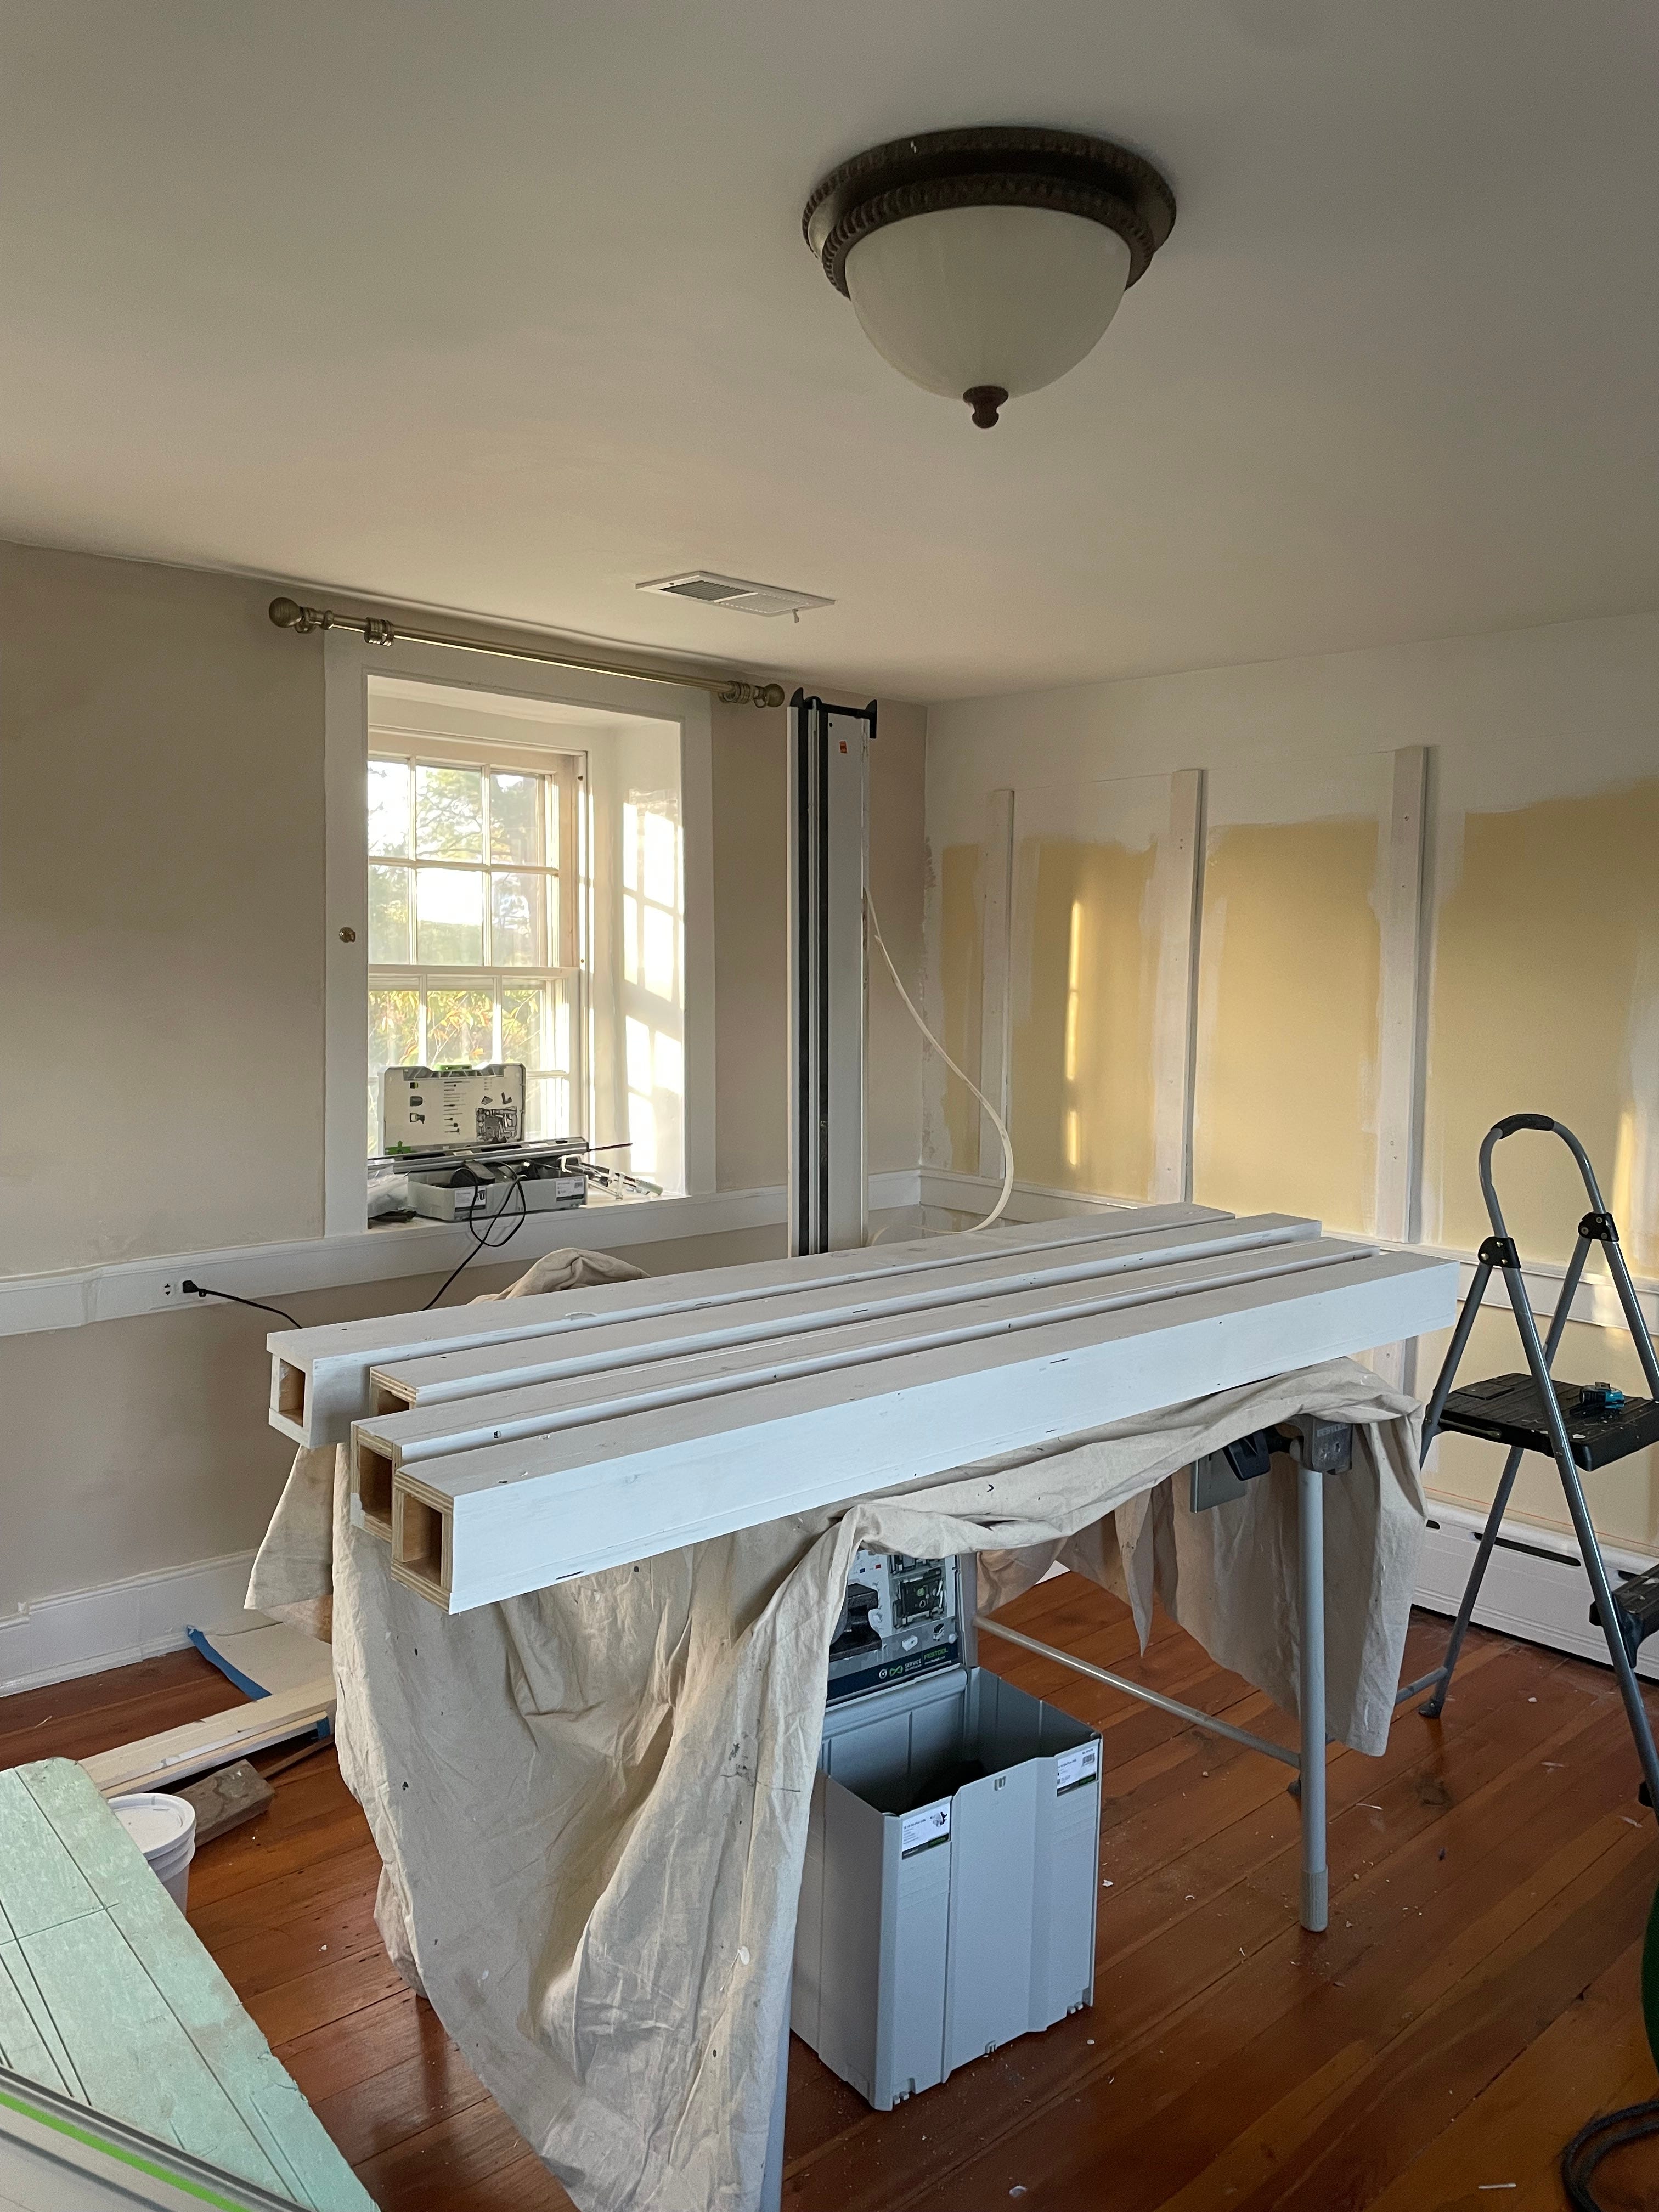
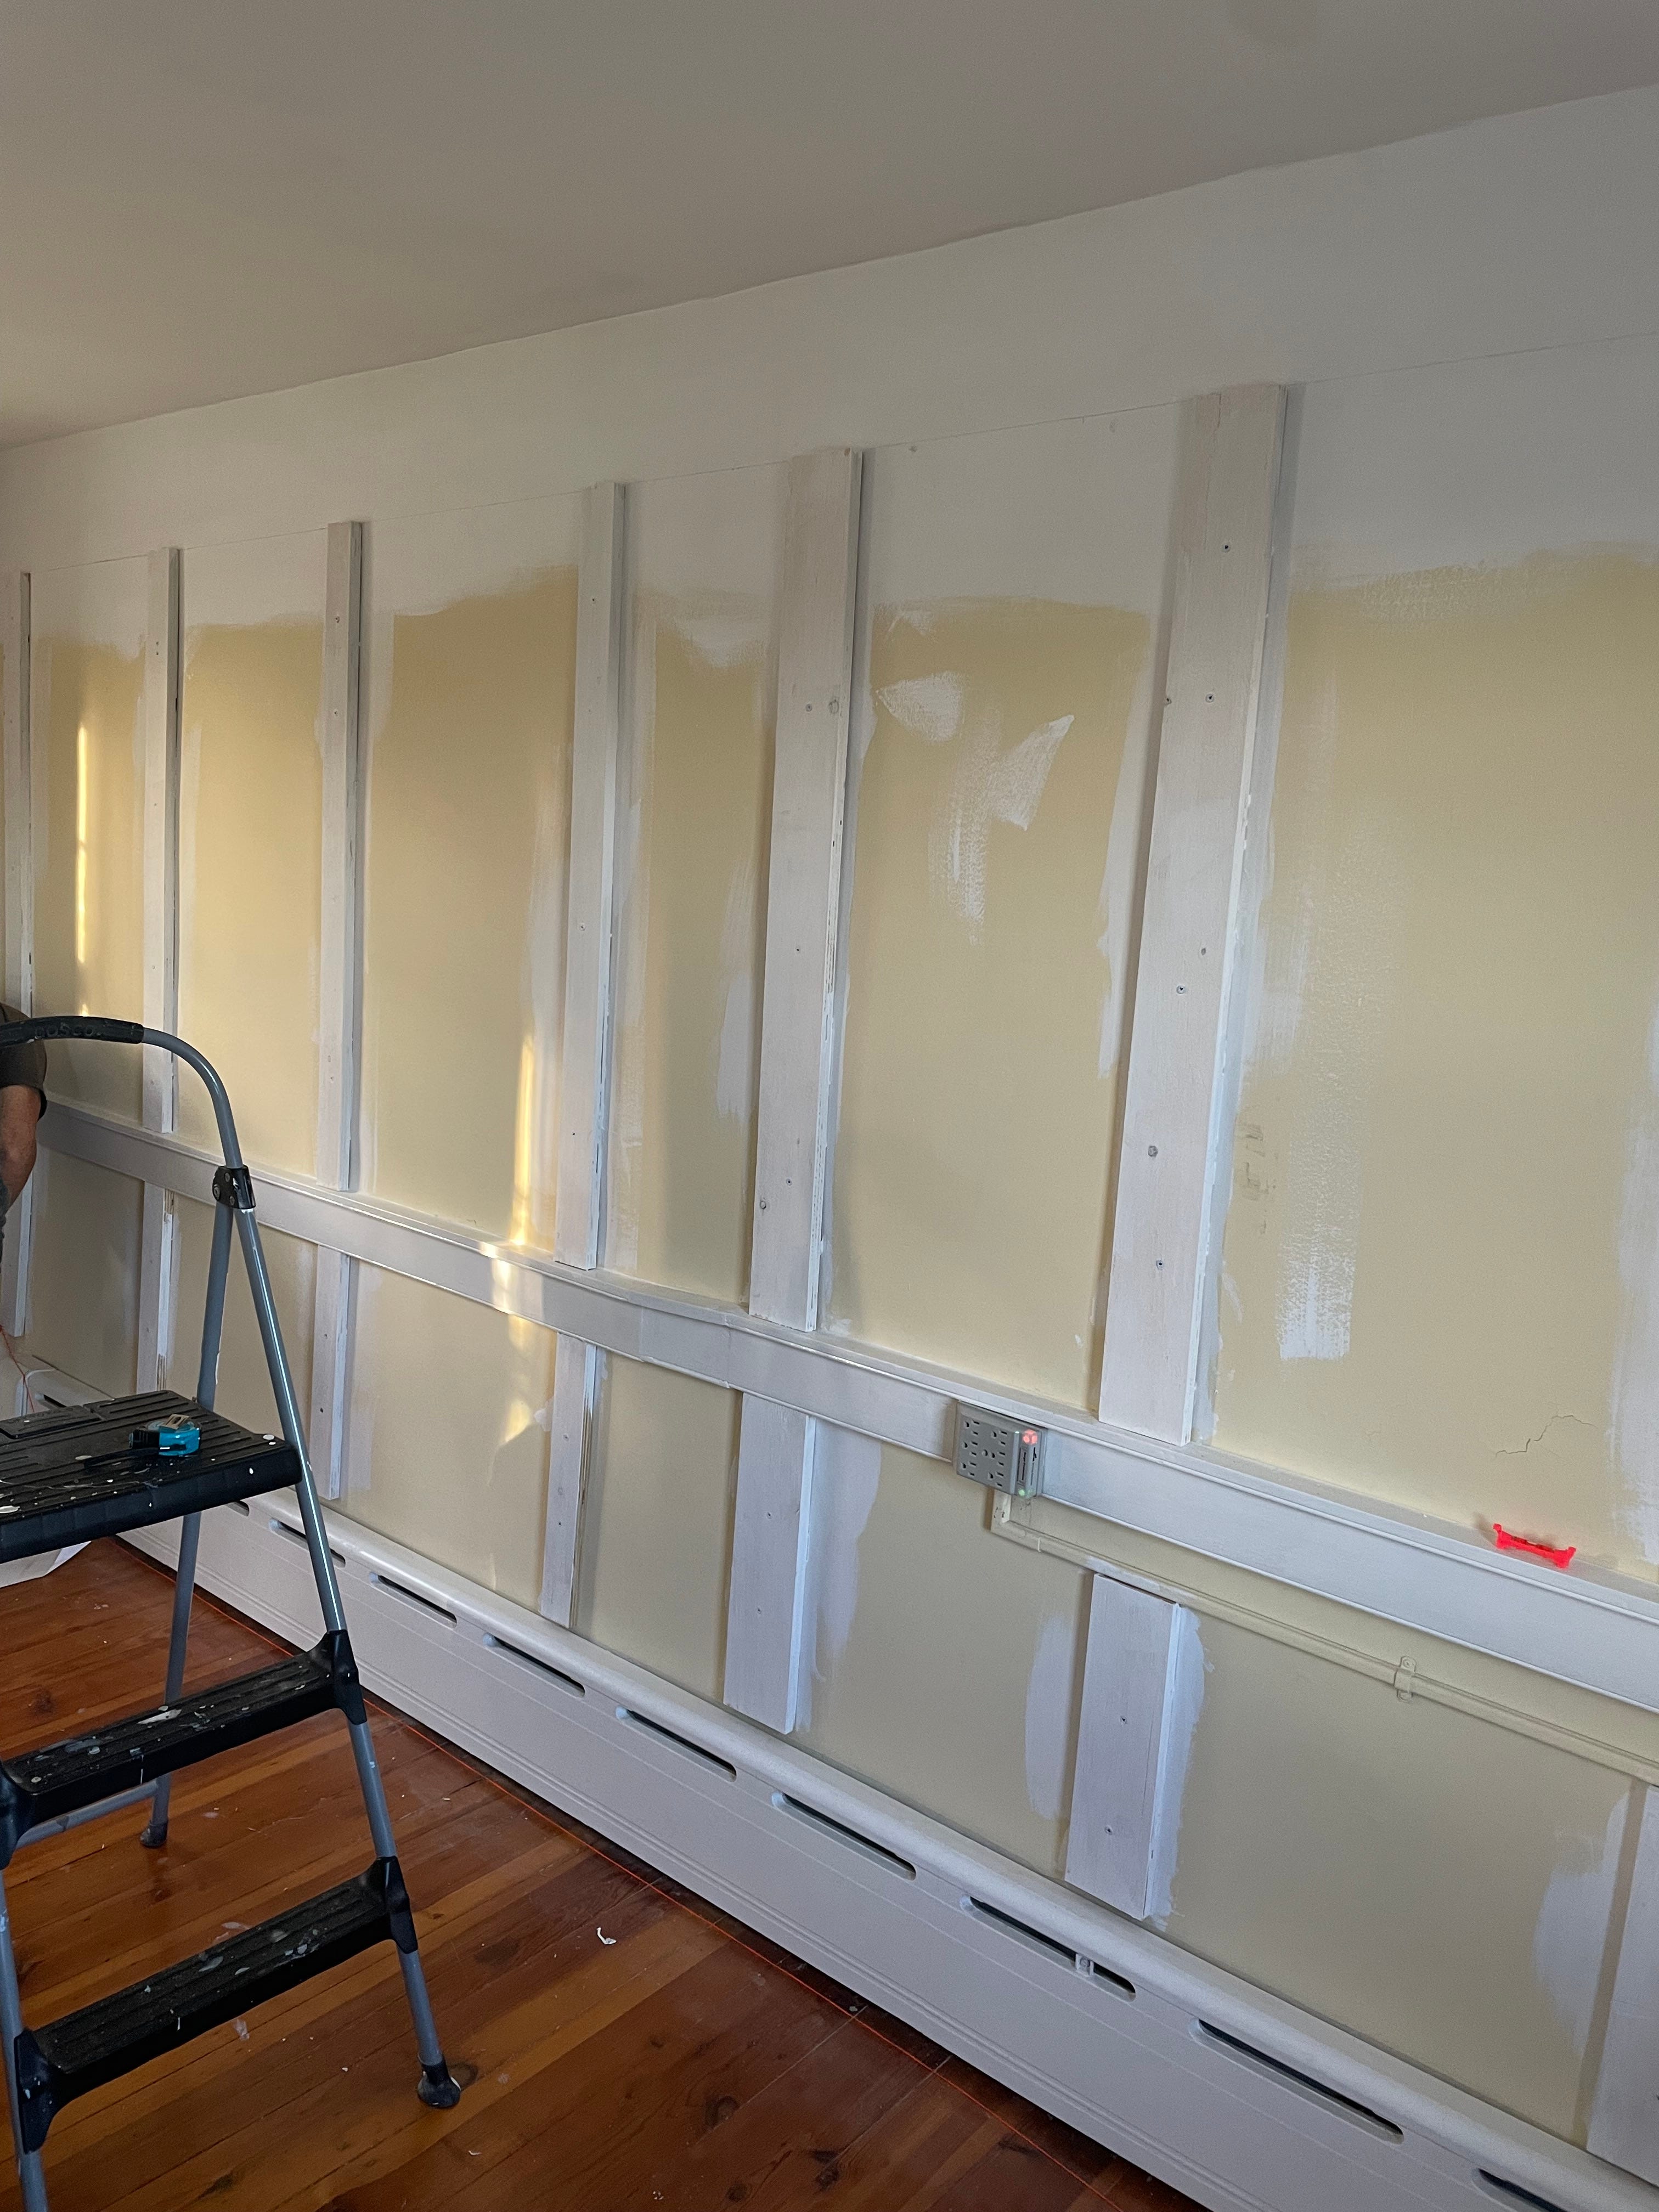
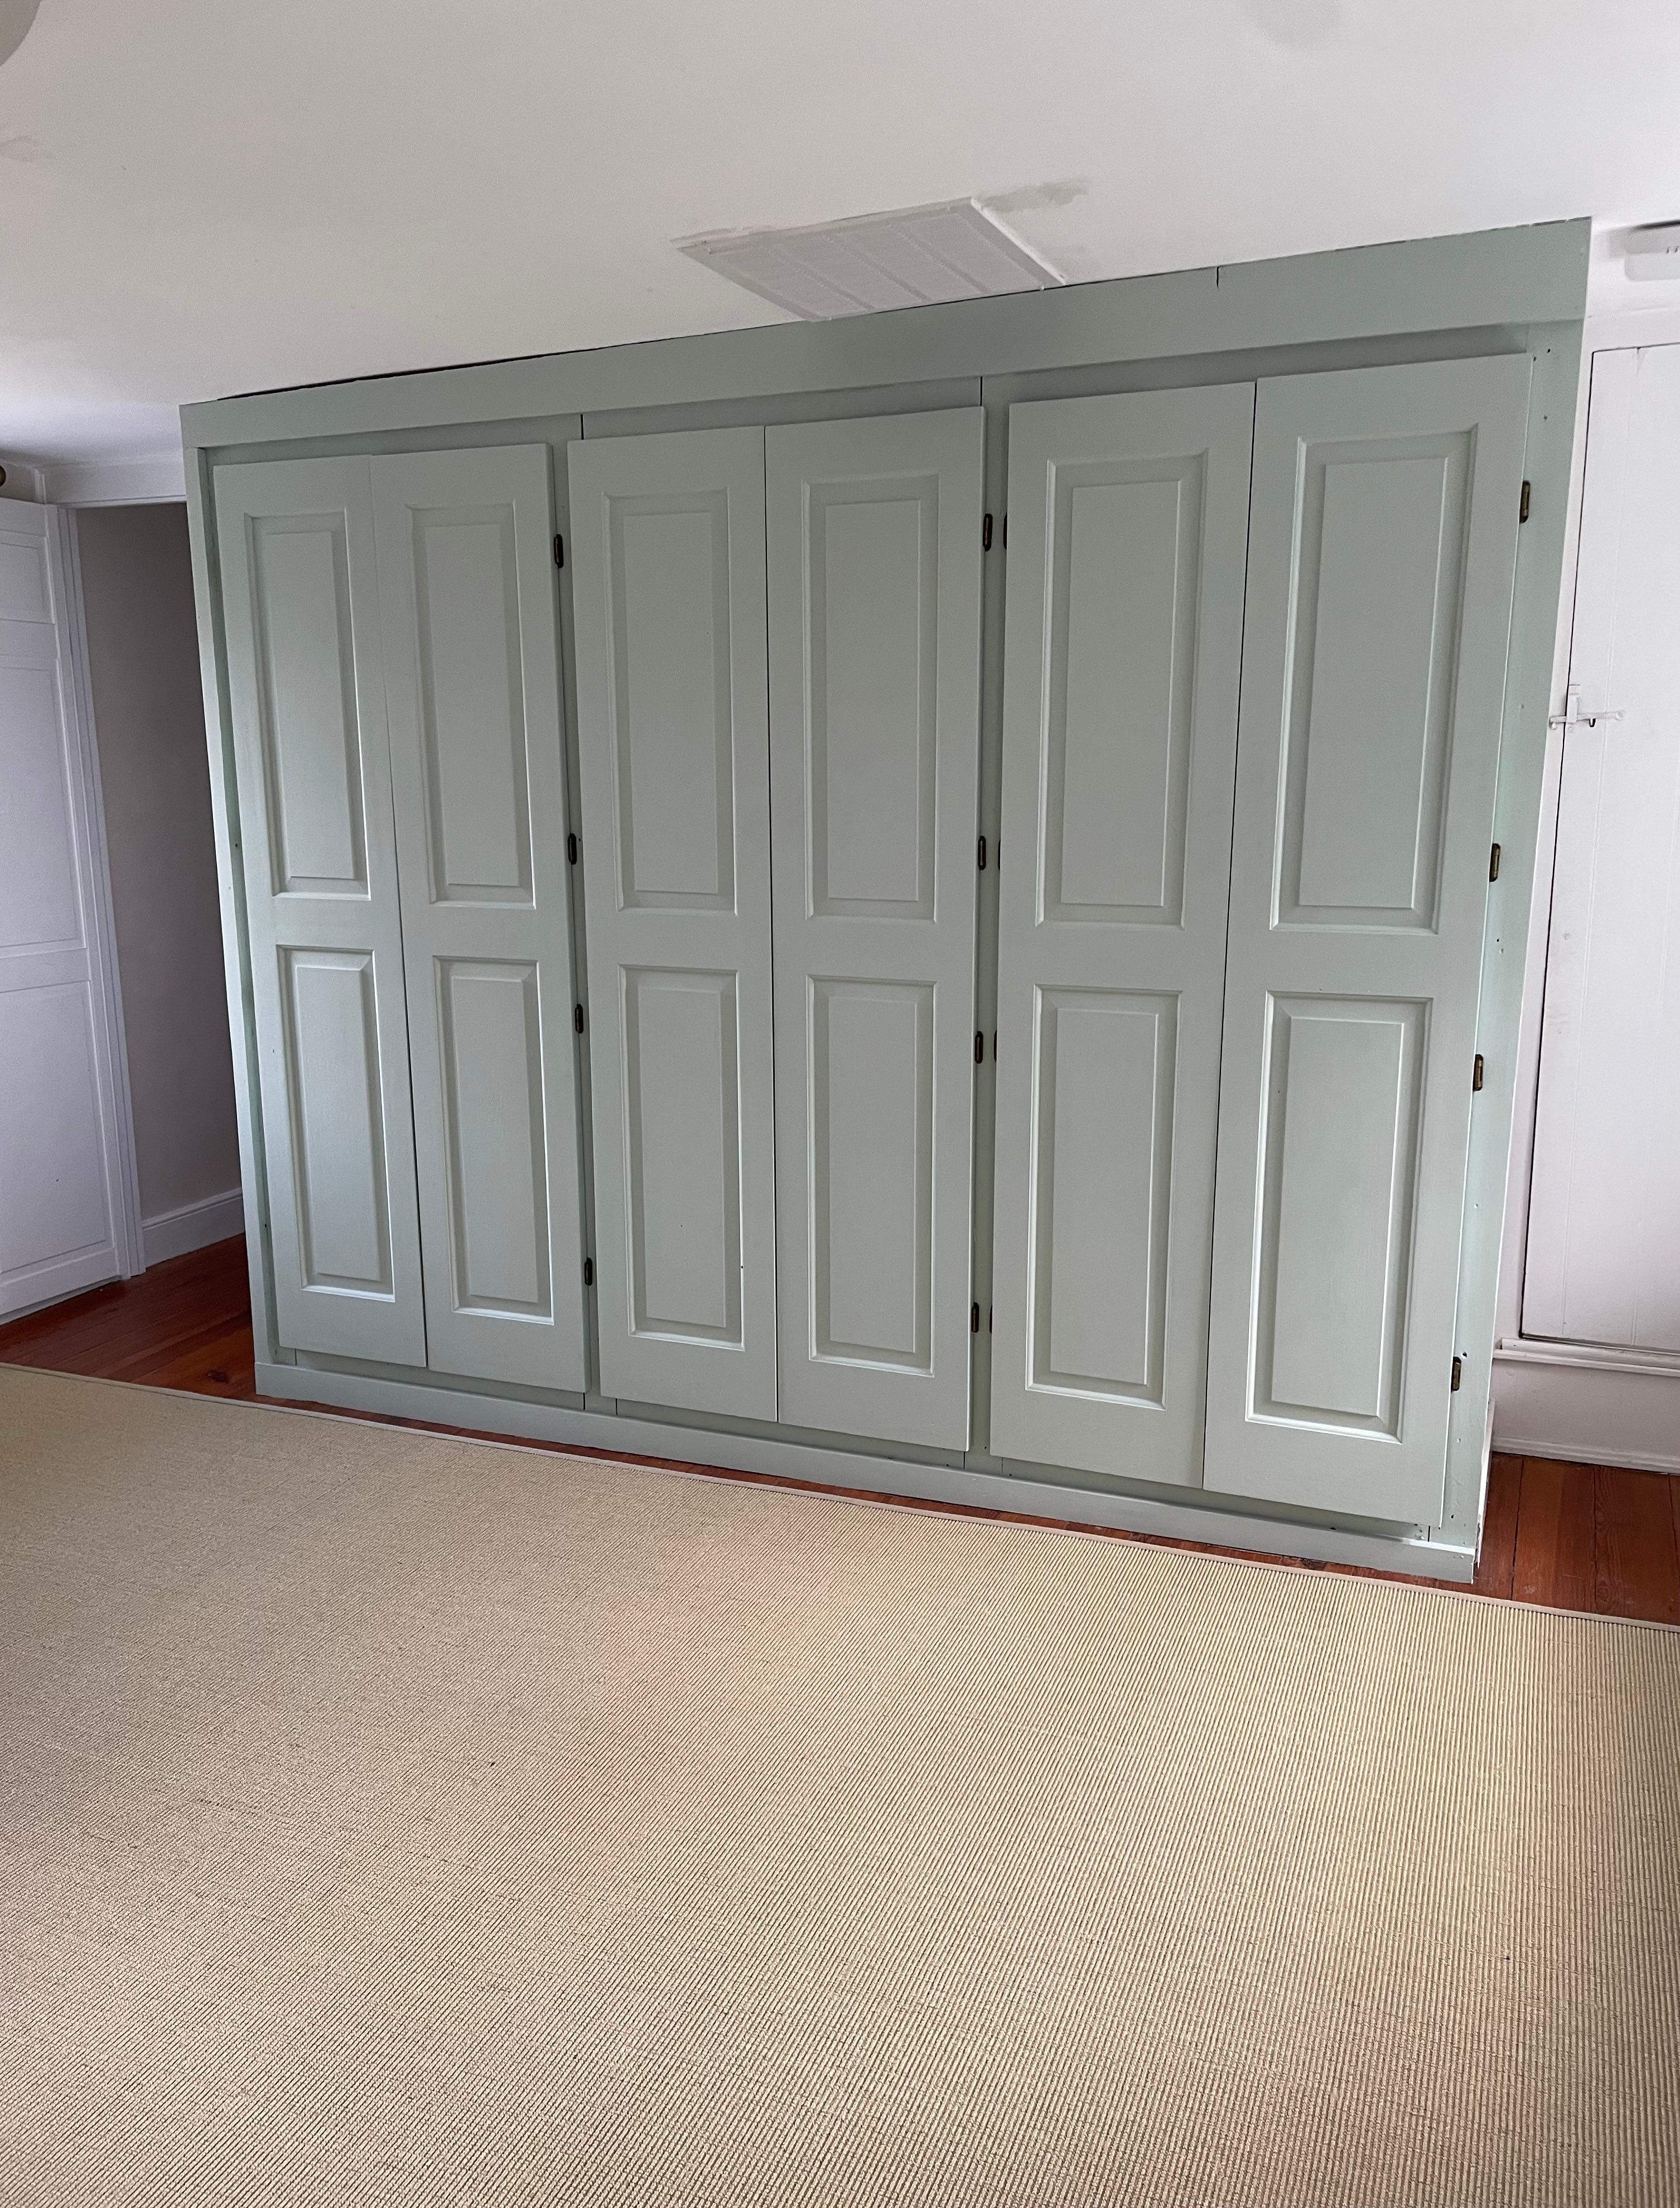
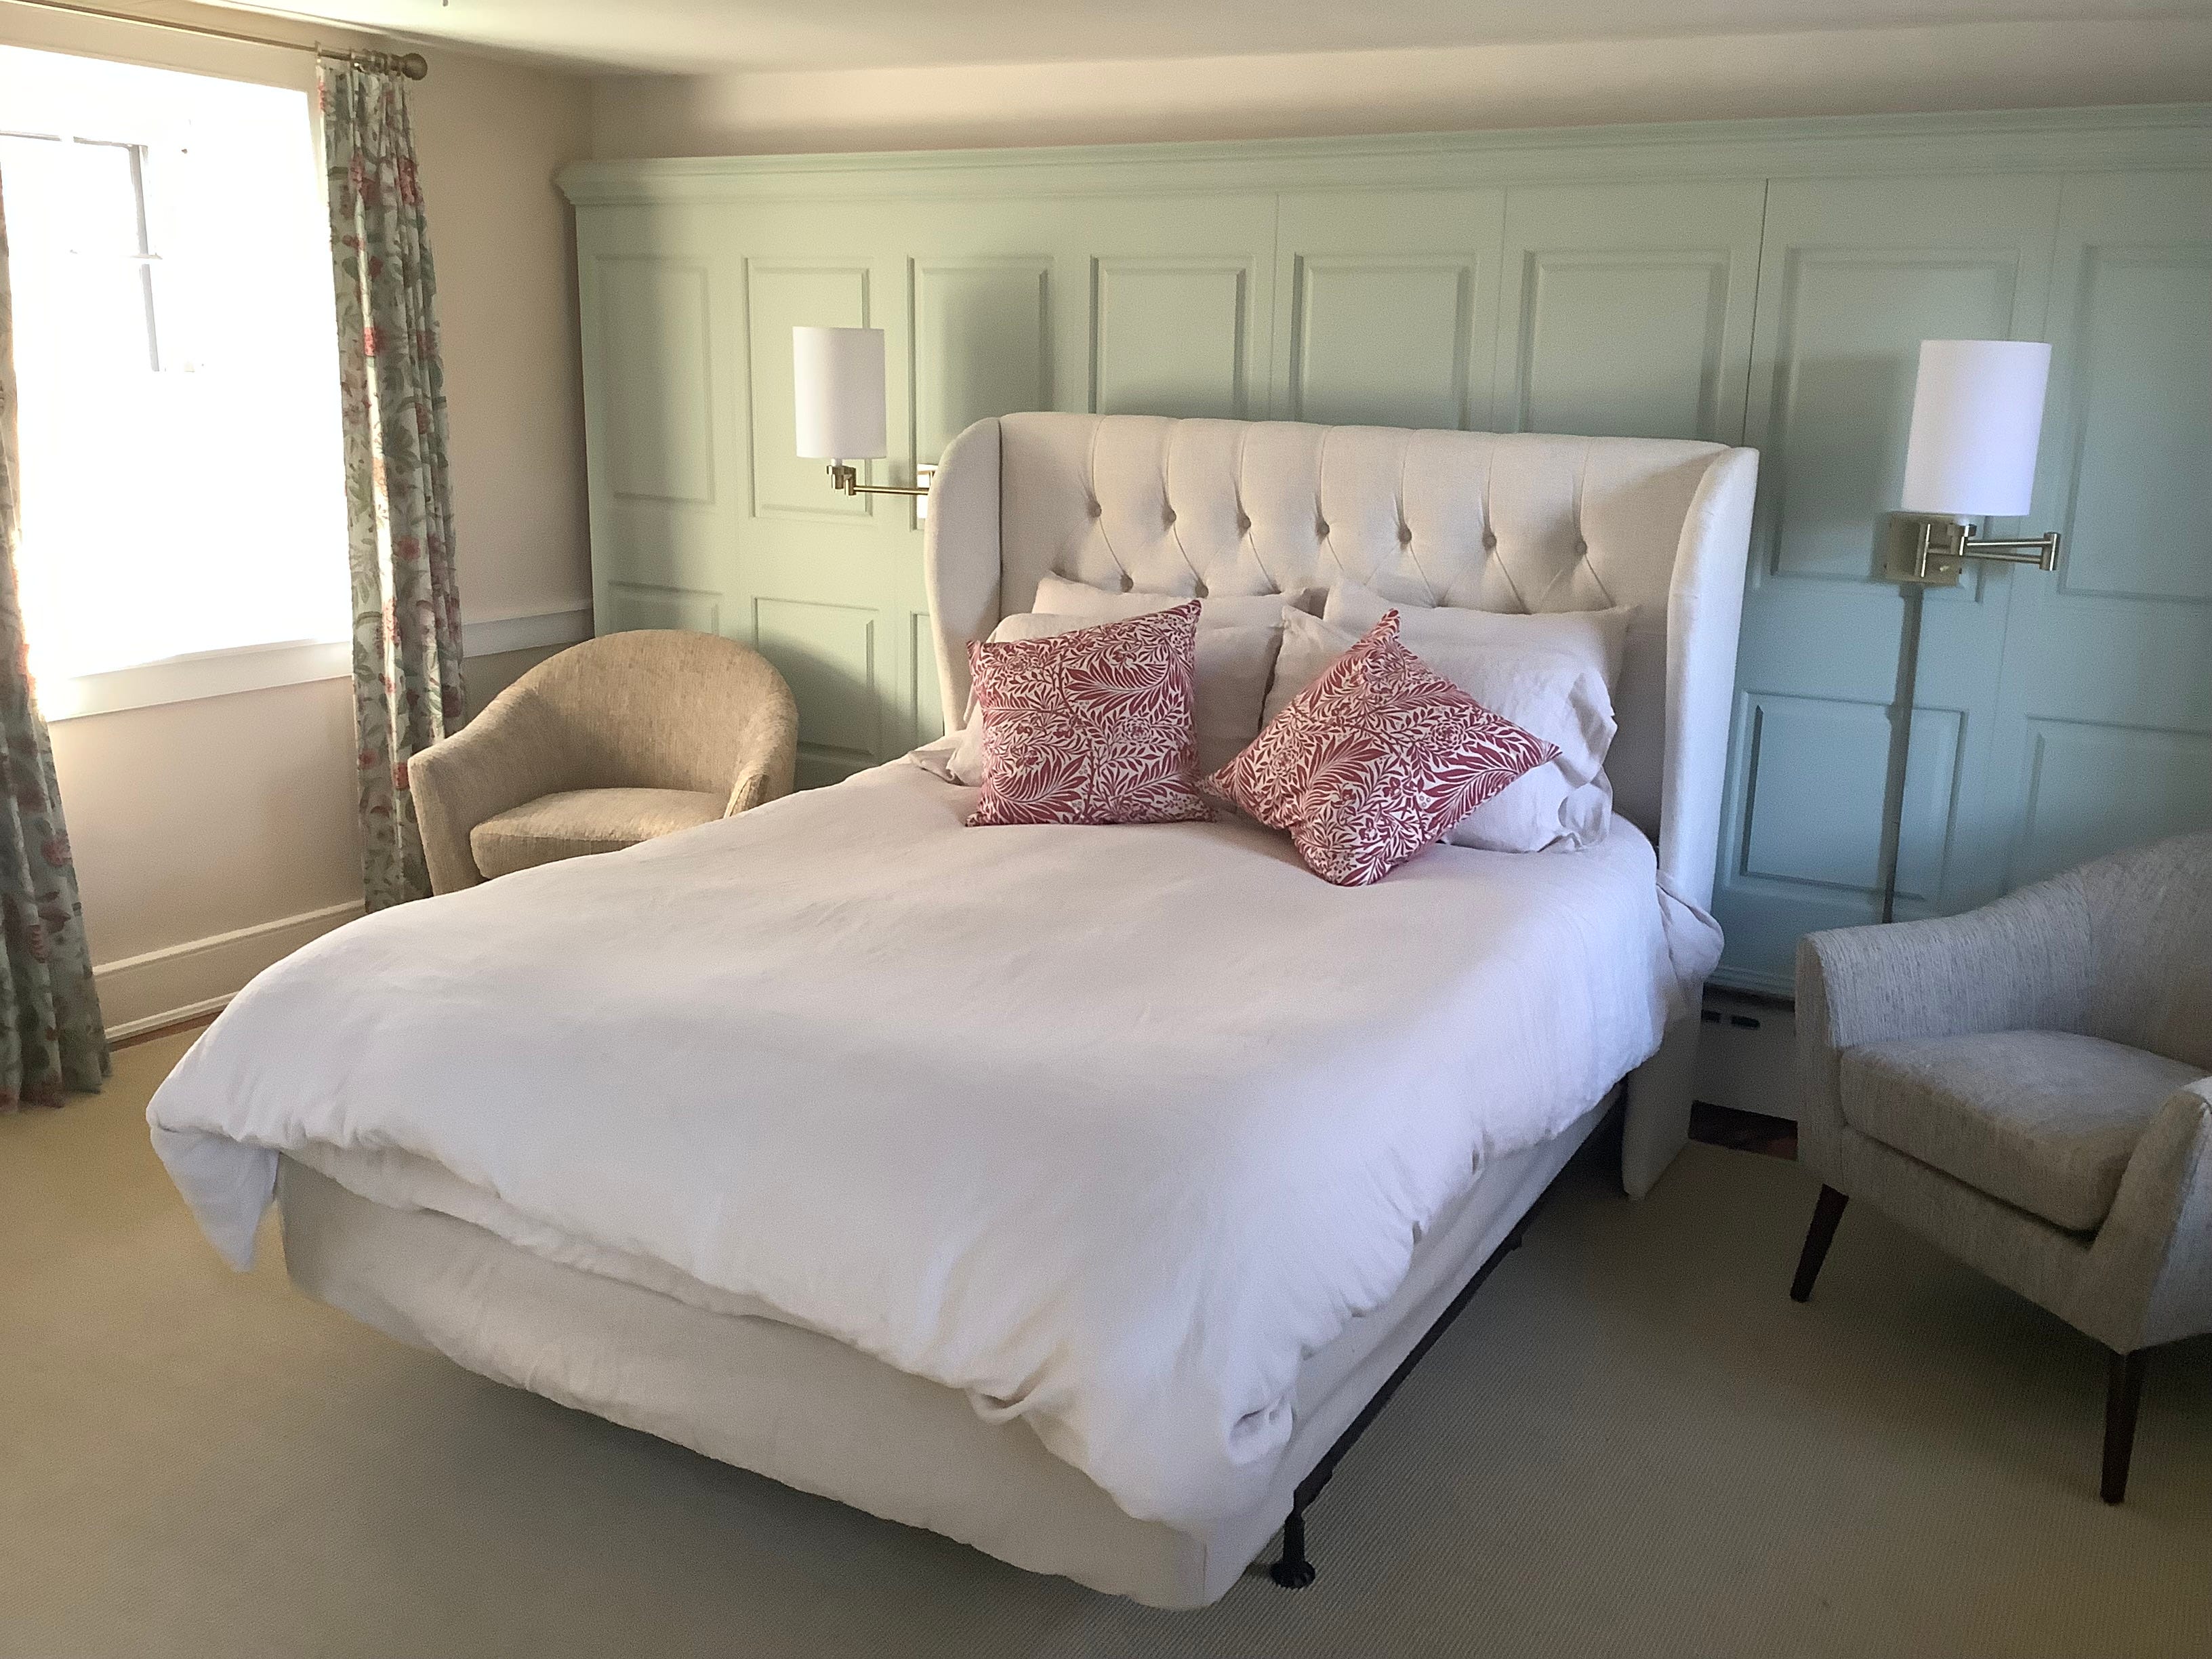
First, it became clear that if we could hide one wall with period-appropriate paneling, and camouflage the windows with curtains, we could downplay the most obvious imperfections. Choosing tall wainscoting that came near, but not up to the ceiling would create a new, level visual line and if the exposed wall matched the ceiling it would disappear. Second, repainting the 1950s bank of knotty-pine closets to match the wainscoting could reduce the “Summer Lake House” feel of the space.
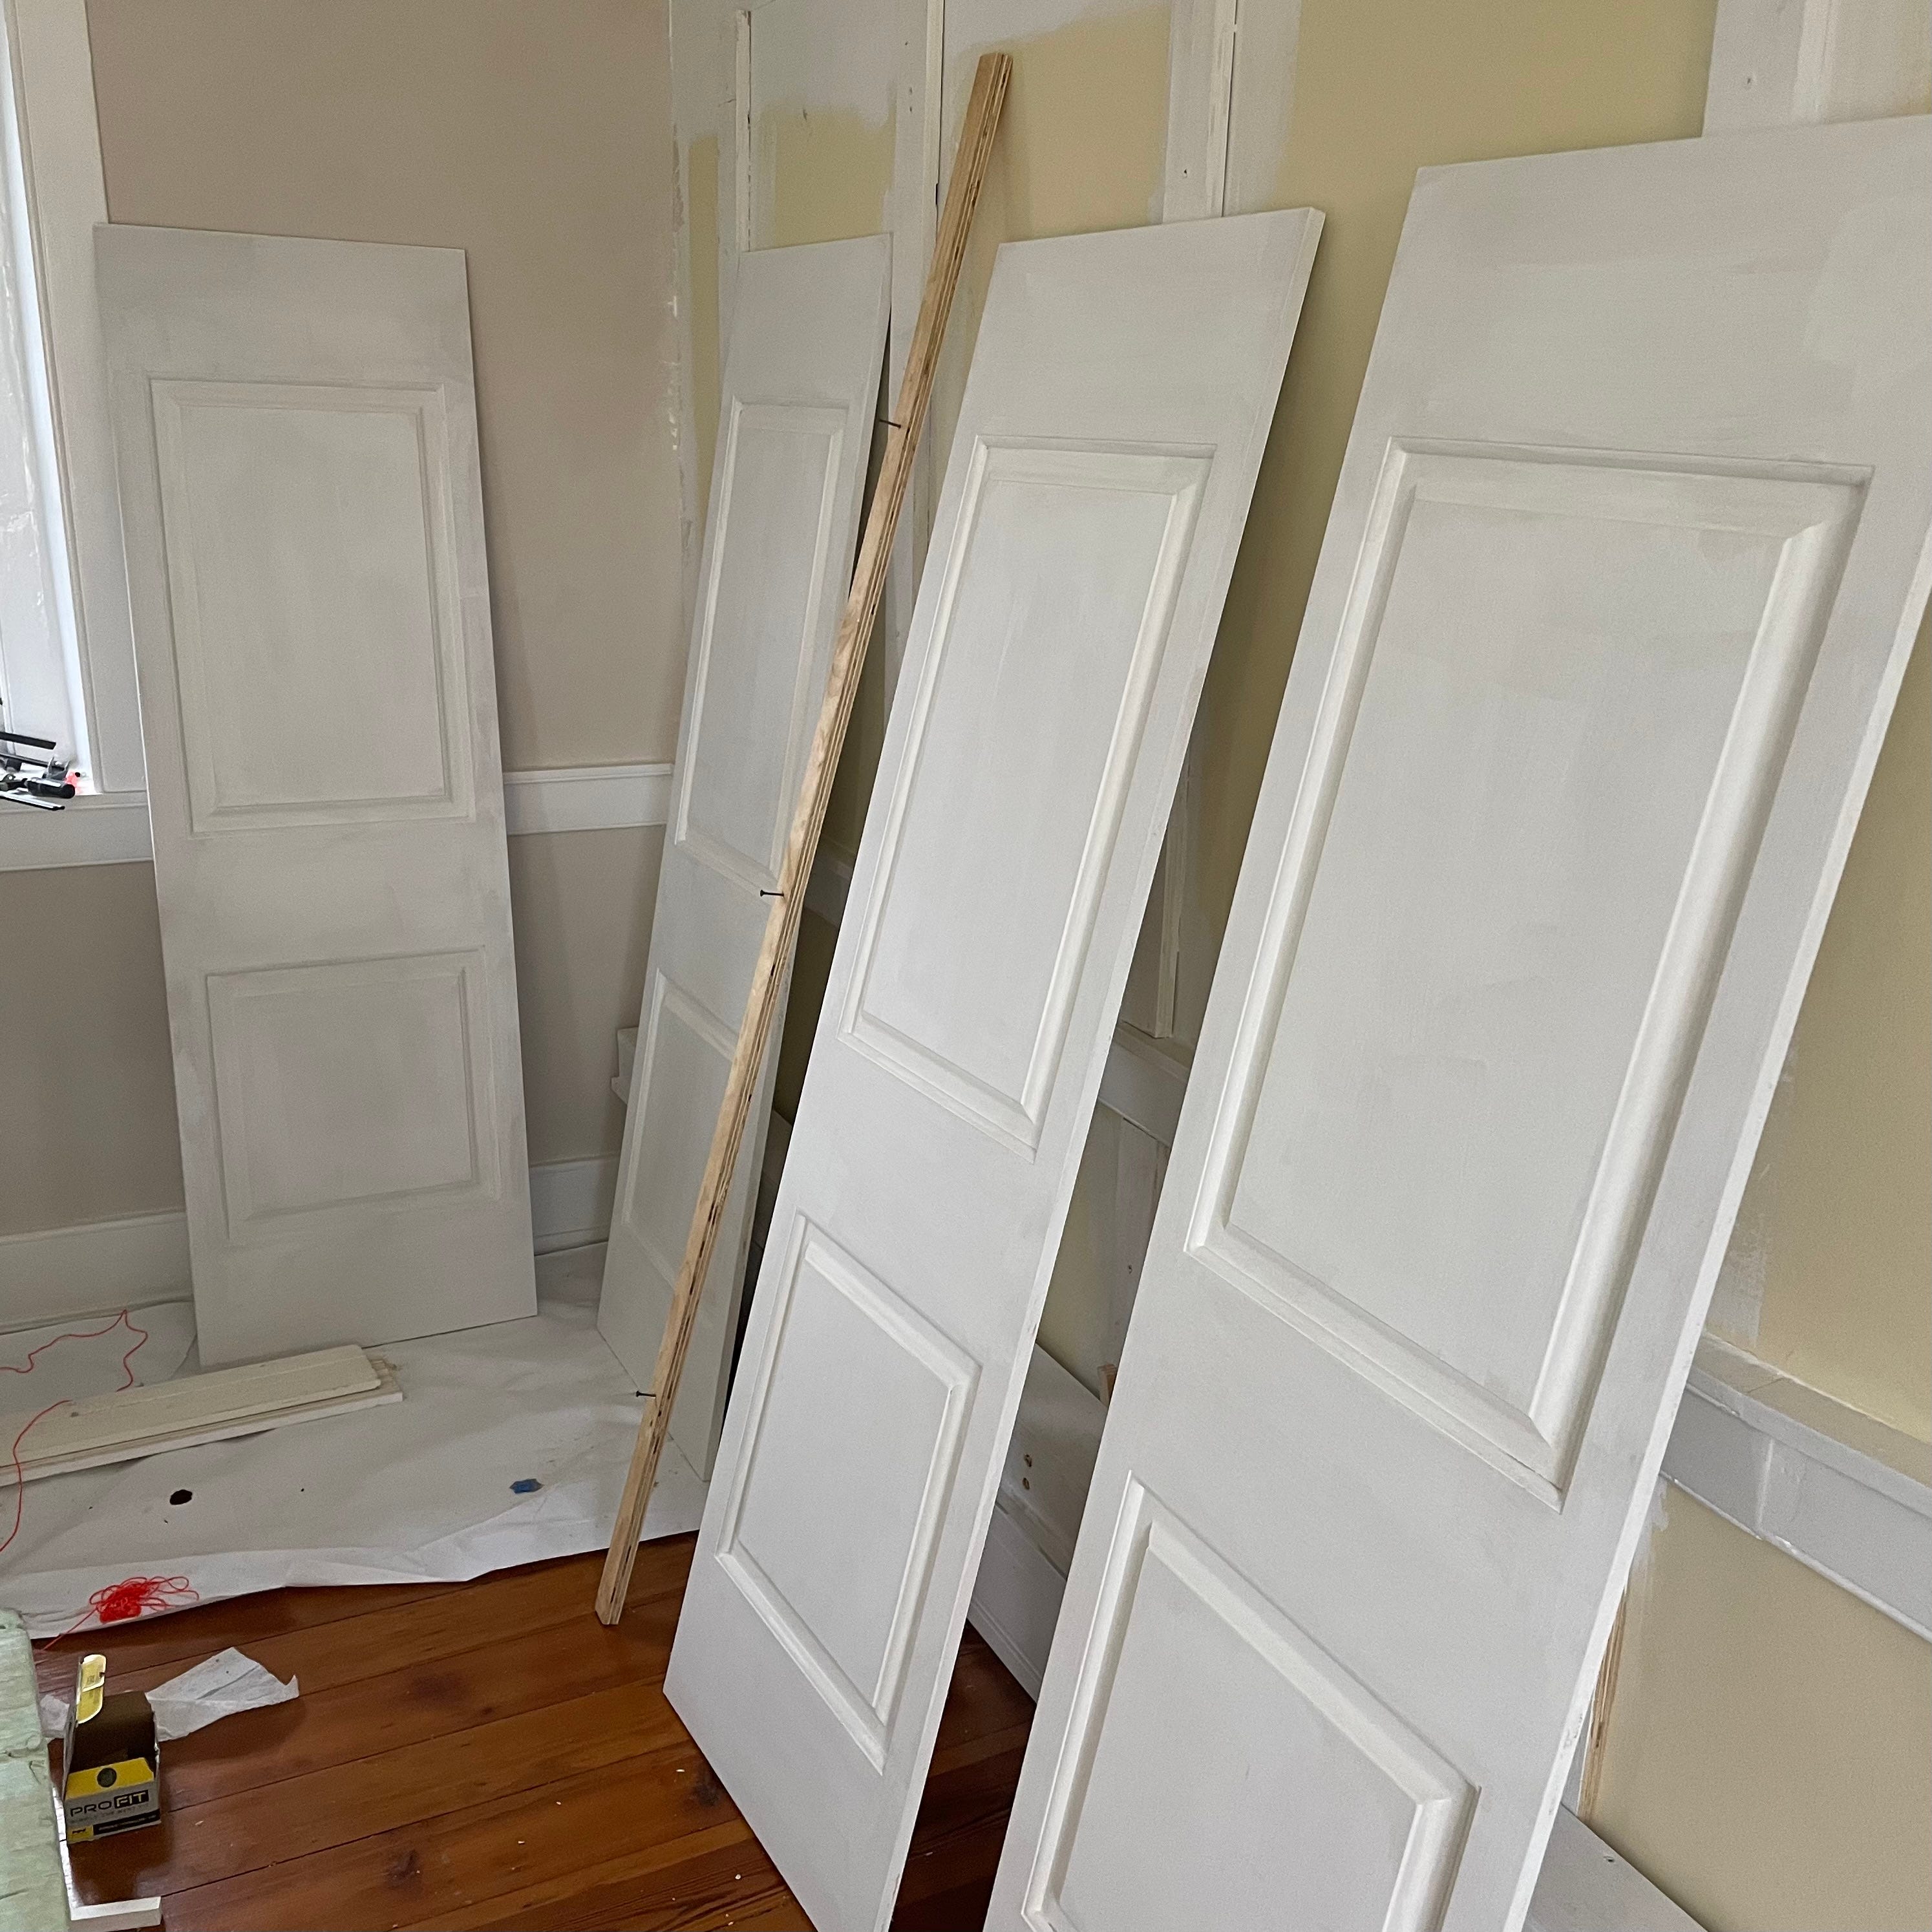
Reverse engineering a structure to create a plumb line from top to bottom was accomplished by trial and error, tweaking each of the individual torsion boxes until they came true to the line. These boxes were attached to battens that were drilled into the stone and reinforced with construction adhesive. The VIP of the process was my Festool Domino that allowed me to create a dry mortise and tenon joint between each wainscoting panel to ensure they were flush. My “measure 27 times cut once” approach paid off as when I installed the final panel, it was within 1/16” of the ideal.
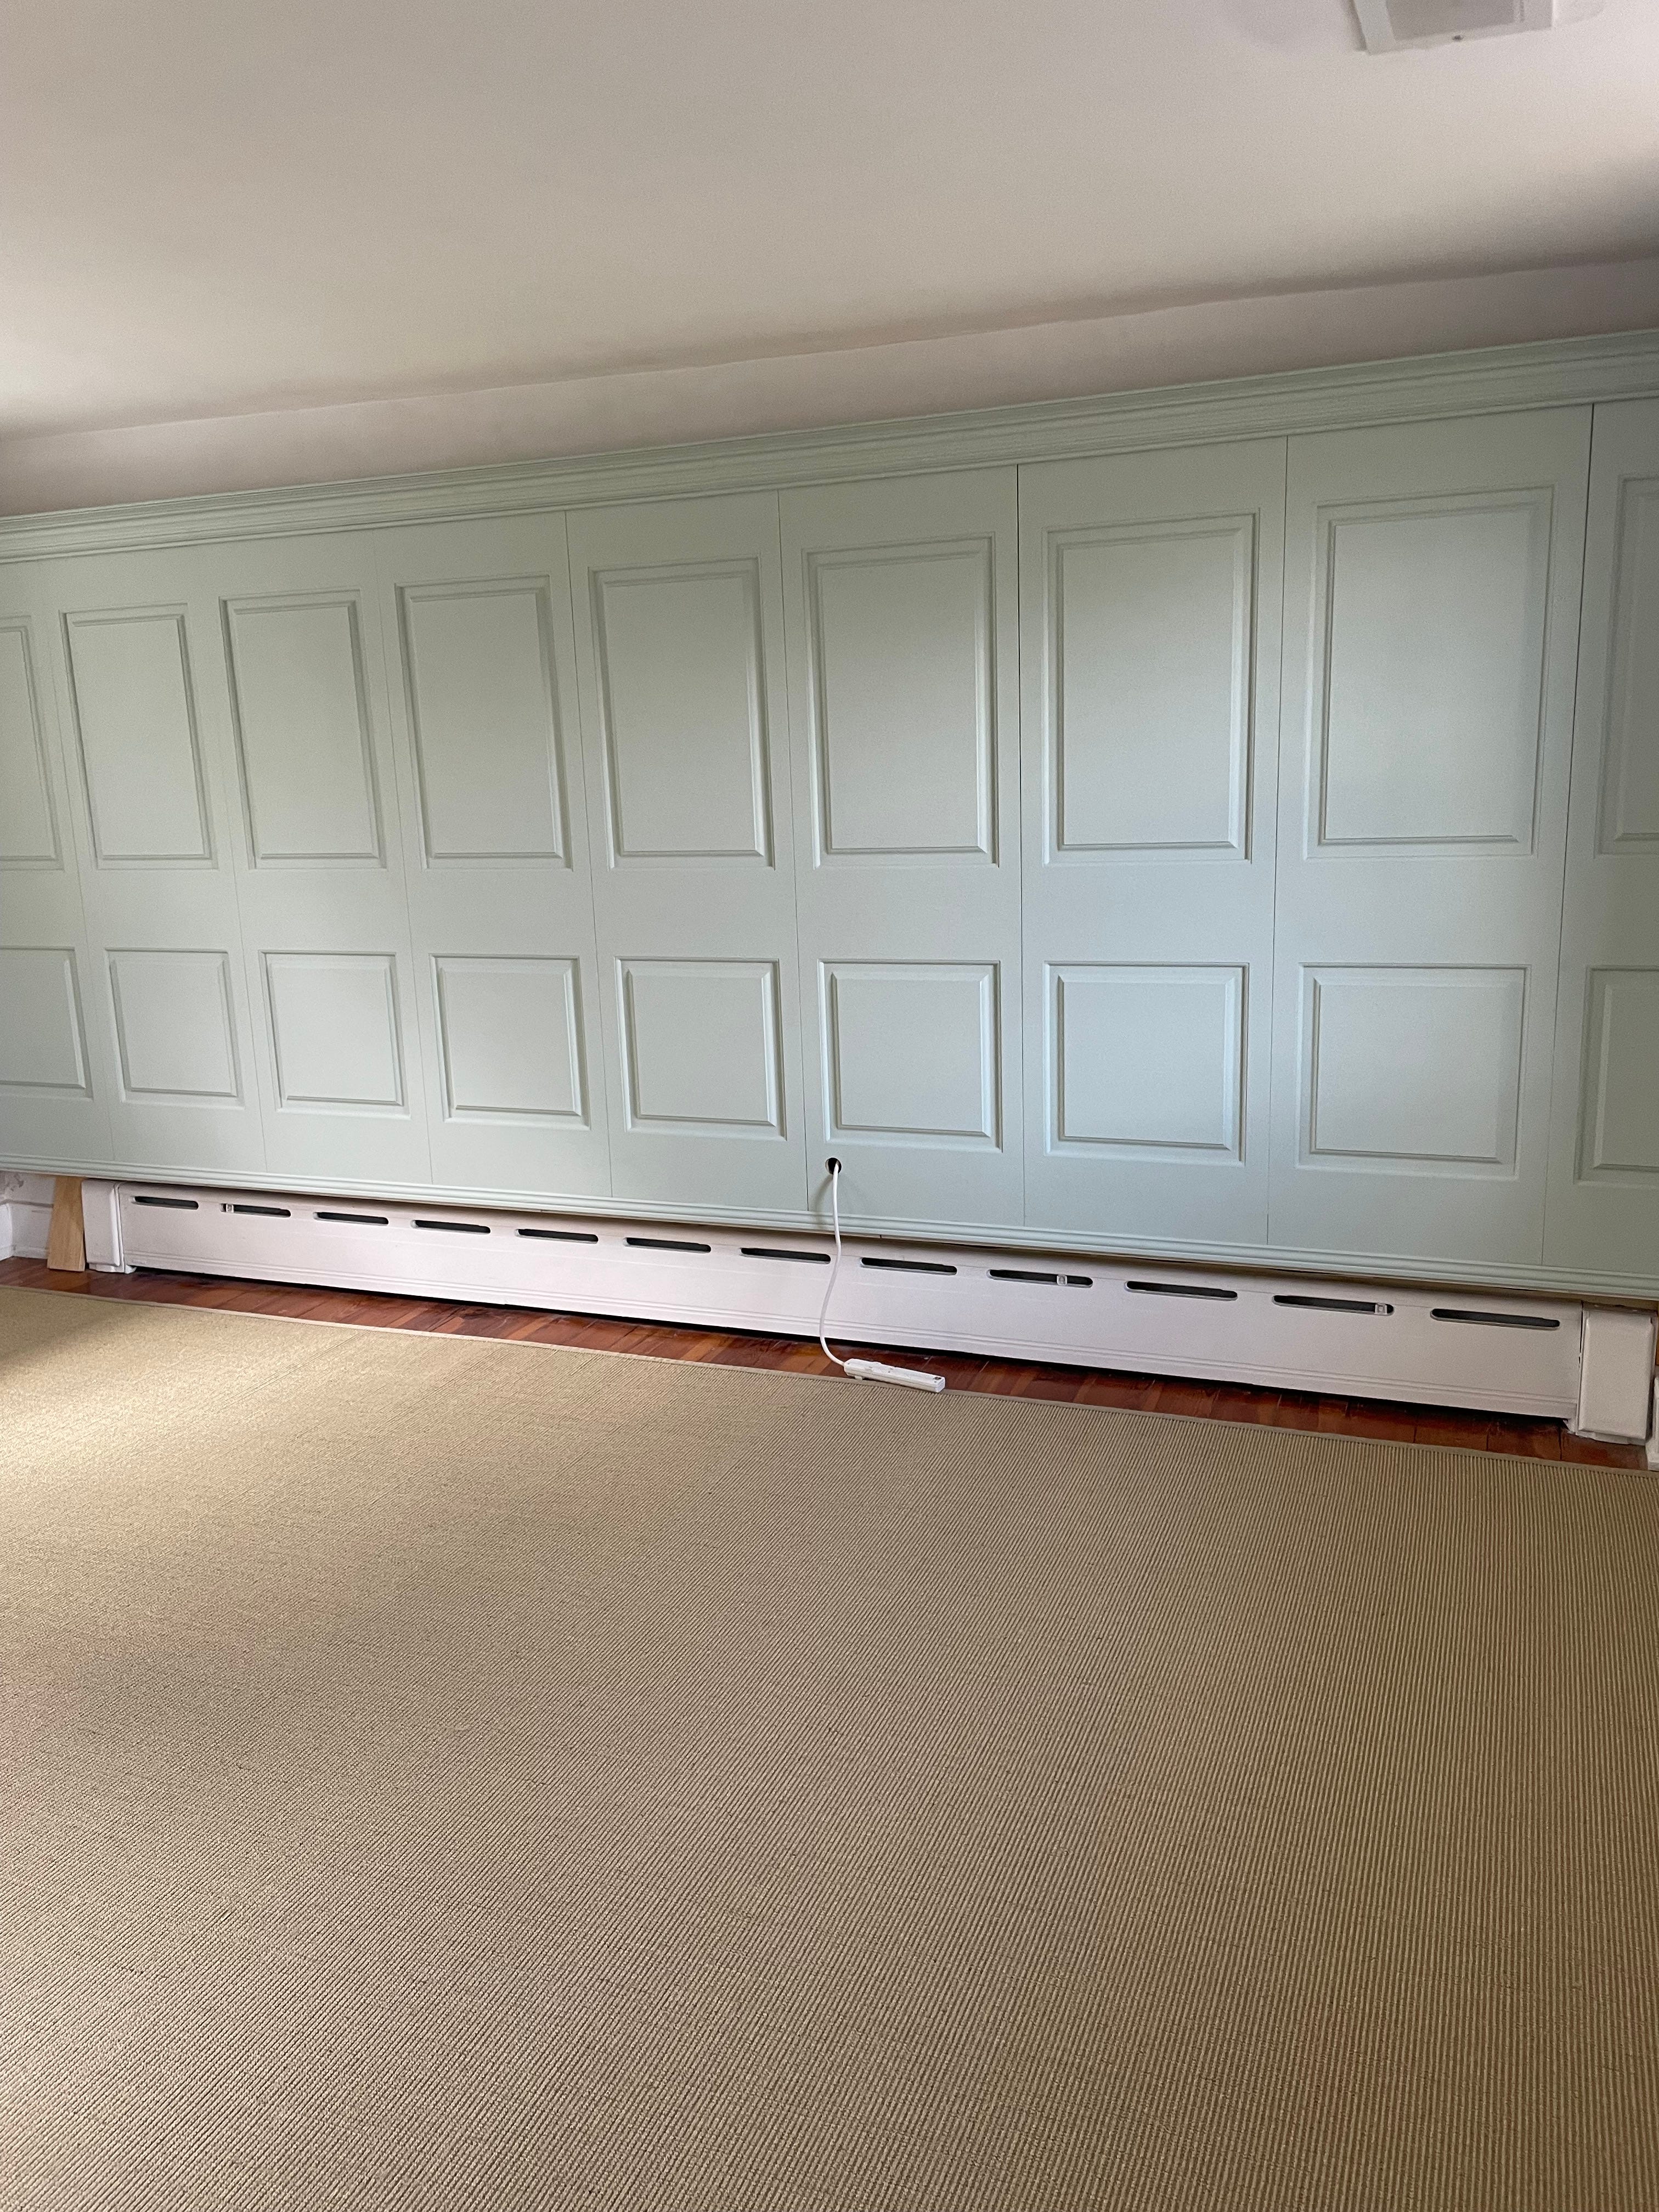
I am not a patient person by nature, but I’ve learned that the only way to get good results is to treat each step as an individual project and not to move on until it is perfect. While it seems fiddly, it saves you from the crushing need to return to step one halfway through the job. Two coats of primer (ugh), cleanup and scraping any drips, two coats of paint, ditto, installation of panels, touch up paint, adjustments, trim and finish. In the end it was about four weeks of work (with breaks for some tennis and dog walking) and I’m very happy with the results. But I’m not itching to take on any more big construction projects this winter—except maybe a portico.
Absolutely awesome!!!
Although you speak about it so humbly, Chris, your craftsmanship is superb. Your 'don't move on until you've finished a step' is excellent advice for any craftsperson. I remember a Windsor chair you made being one of the loveliest things a few years back. Now this house is rewarding you (and us!) with the respect and care you are bringing to it.